Planning a website design project can be complex and time-consuming. And it only gets more time-consuming as more people are involved.
AI tools can greatly improve that process, streamlining your workflows and ensuring that you follow current best practices. By using tools that allow you to keep all of your planning in one place, you can make sure that everyone involved in the project is on the same page as the design process moves forward.
Below, we’ll cover the basic steps in planning a website design project, and cover how AI tools like Walling and ChatGPT can help along the way.
Define the Scope and Purpose of Your Website Design Project
The first step in any website design project is to define the scope and purpose of the project. This applies whether you’re creating a new site from scratch or redesigning an existing site.
During this phase of the project, it’s important to clearly define the goals of the project. What is the purpose of the website? Who is the target audience? What are the goals for the design project and for the website itself?
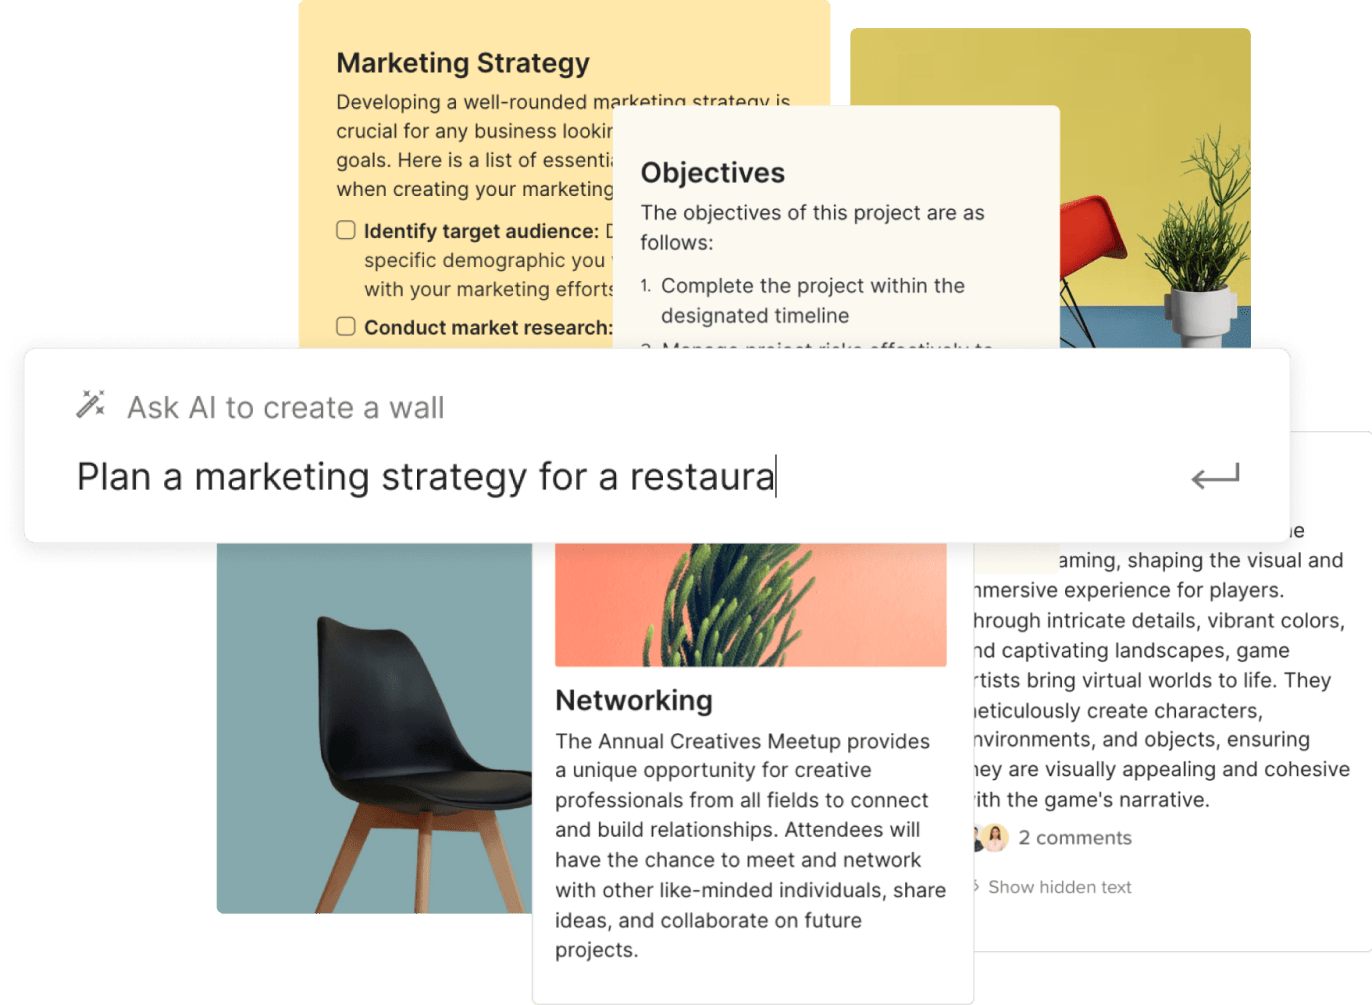
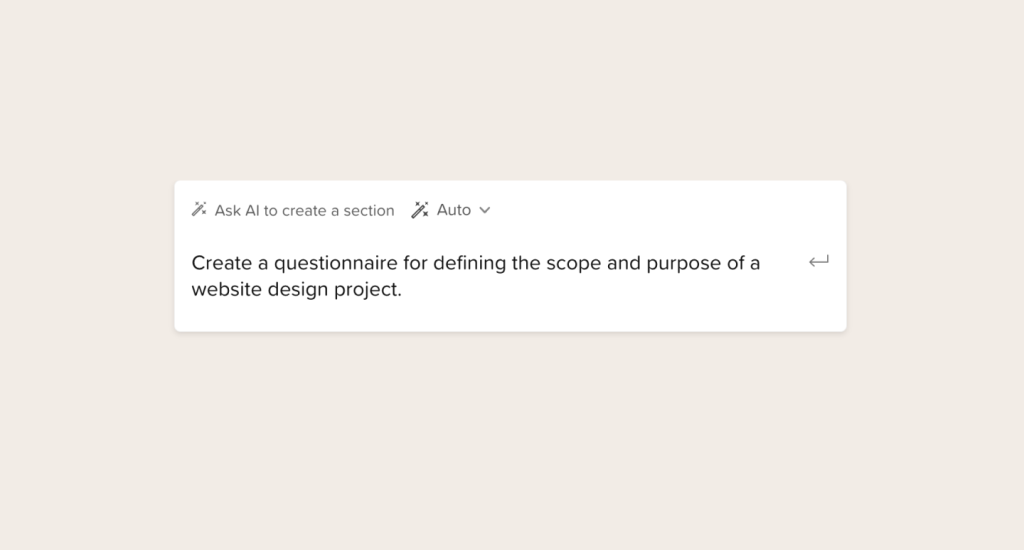
We’re going to use Walling and ChatGPT to help create a comprehensive website design project plan. Start by creating a new Wall, then create a section titled “Scope and Purpose.”
From there, I used Walling’s built-in AI feature to create a questionnaire to define the scope and purpose. Here’s the prompt I used:
Create a questionnaire for defining the scope and purpose of a website design project.
You can add more details to the prompt, depending on your project. For example, you might want to add in something about what type of website you’re working on or what industry it’s serving to get more detailed questions.
You’ll also want to define the target audience in this phase. You can create another Block within the same Section, using the following prompt:
Create a questionnaire for defining the target audience of a new website design project.
As with the previous prompt, you can add in more details to get tailored questions for your particular target audience. If you’re working with a client, you can ask them these questions to gather the required information. If you’re working on your own website, take some time to work through these questions and answers.
Create a Competitor Analysis
It’s important in any website design project to conduct a thorough competitor analysis. While the specifics will vary based on the type of website you’re creating, there is some basic data you should collect about the most successful competitors for your site.
For example, you’ll want to make sure you look at things like branding, accessibility, the types of content they include, if there are any standout visual or UX elements, and whatever engagement metrics you can find. For some sites, you may also want to make note of what CTAs they’re using or how their ecommerce pages are set up.
A table is an excellent way to track this type of competitor analysis. Walling can create a basic table for your analysis. Here’s the prompt I used:
Create a table for conducting a website competitor analysis with relevant columns.
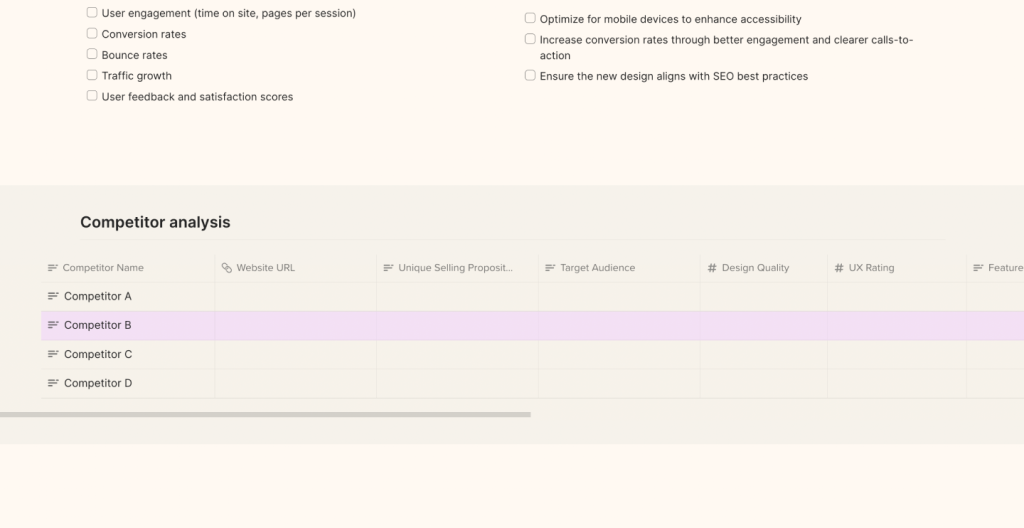
Walling created a basic table, but it only included a couple of columns about things like mobile responsiveness and the average page load time. While those are important factors to include, we want to include more information for each site. To get a more comprehensive list, I turned to ChatGPT. Here’s the prompt I used there:
What data should we include in a competitor analysis?
ChatGPT gave me what might be considered too comprehensive of a list. From there, though, I was able to discern which items were most relevant (standout visual elements, types of content, unique value proposition, engagement metrics, CTAs, ecommerce features, and onsite customer support features) and add them to the table Walling created.
You may also want to include a section in your project plan with screenshots from competitor websites, particularly the parts they’ve done very well or very poorly.
Creating a Sitemap and Defining Your Site’s Information Architecture
Once you’ve defined your site’s scope and purpose and done a competitor analysis, you should have enough information to move forward with creating a basic information architecture plan and creating a high-level sitemap with the basic pages your site will include.
Create a Section within Walling to organize this information. If you create a flowchart or tree-style sitemap in another app, you can include it as an image within this Section.
If you’re unsure of what content to include, you can turn to ChatGPT for ideas. If you’re using GPT-4, you can share links to competing sites and get an overview of the kinds of content they include, and then use ChatGPT to write your own content (or at least a draft of it that you can revise later in the project). Using real content, even if it will later be replaced, can help with creating your site’s wireframes and mockups.
Here’s an example prompt you could use:
Review the content on the first page of search results for “XYZ Keyword” and summarize the most common elements. Then create content based on those search results for [describe your product here].
You can also provide exact URLs instead of general search results, taken from your competitor analysis.
Create a Moodboard for Your Website Design Project
Moodboards are an important part of the visual design process for your website. Walling has a moodboard Block template ready for your use. Once you’ve added the template to a new Section, there are a variety of tools you can use for importing images. You can upload your own images, of course, or you can search Unsplash or Giphy. But where Walling stands out is that they also include AI tools for creating custom images for your moodboard.
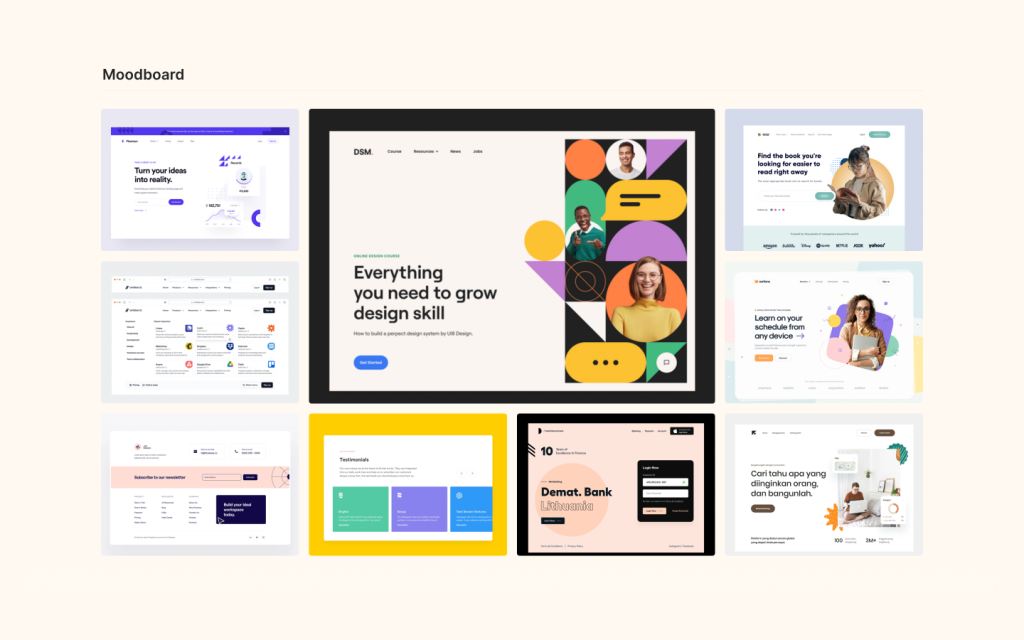
Using the AI tools, you can enter some basic keywords related to your site’s mood, color palette, or other elements to get interesting ideas to include. This can be a big time saver compared to searching through thousands of stock photos looking for something that properly captures your vision.
For example, you might use a prompt like this:
An image of a modern housewares shop with a red and white color palette
Add as many images as you want to your moodboard. You can also add text Blocks to the moodboard if you want to include any descriptions of the images there.
Moodboards are a great way to make sure that everyone involved in the project is on the same page when it comes to the basic mood and visual style of the project. Show polished versions of moodboards to your clients or team members to get their buy-in before you start designing actual wireframes and mockups.
Creating Design Mockups and Wireframes
Wireframes serve as a blueprint, outlining the basic structure of a website. This stage is crucial for setting up the layout, defining functionality, and establishing content hierarchy. A wireframe’s focus is on the placement and size of elements rather than on aesthetic details. It’s important to keep wireframes simple, using straightforward tools like Figma, Adobe XD, or even traditional pen and paper. Collaboration at this stage is key, as it brings diverse perspectives and ensures that the basic structure meets various needs and expectations.
You can add your wireframes in a new section in Walling, to keep everything organized. Just upload them as images and feel free to use text Blocks to annotate them. Share them with stakeholders to get approval before moving on to higher-fidelity mockups.
Following the approval of a wireframe, the next step is developing a mockup. This is where the website starts to take on its visual identity. Unlike wireframes, mockups are rich in design elements, incorporating specific colors, fonts, and images, adhering to brand guidelines. Mockups also replace placeholder text with actual content whenever possible, offering a more realistic view of the final product. Tools like Adobe Photoshop and Figma are commonly used at this stage to create these high-fidelity representations.
Like your wireframes, you can add mockups to Walling as images. Alternatively, if you’ve created interactive mockups (or prototypes), you can link the images to the interactive versions.
Collecting Feedback
It’s important to collect feedback from other stakeholders at every stage of your website design project. Honest feedback can save time in the long run, as it’s easier to make major changes during the planning process than it is to make changes to a finished prototype or production website.
If you’re using Walling, there’s a messaging feature built in that you can use to leave notes for others working on the project. This can be a great way to keep notes about the project, additional ideas, or criticism in one place, where it’s easy to reference what the stakeholder is addressing. You can even copy links to particular sections if you want to make sure others are looking at exactly what you’re referencing.
Turning the Project Over to Your Developers
Once your mockups have been approved by your website’s stakeholders, you’ll want to turn them over to the development team. You may want to share your Walling project with the developers, to give them additional insights into the planning of the site. This can clear up confusion if something in your mockup isn’t 100% clear, without having to go back and forth with feedback.
Benefits of Using AI for Website Design Projects
There has been much speculation about whether AI will eventually replace website designers. While that’s certainly possible at some point in the future (the technology is definitely not ready for large-scale projects presently), right now AI provides a wealth of tools and resources that designers can take advantage of to streamline and speed up their design process.
AI can help you:
- Save time organizing information
- Create placeholder content that resembles the final content (which is much more useful than using lorem ipsum)
- Generate images either for the final website or for your moodboard
- Save time searching for best practices
In the end, AI is a tool like any other software or application you might use in the design process. How you use it, and to what extent, is entirely up to you.